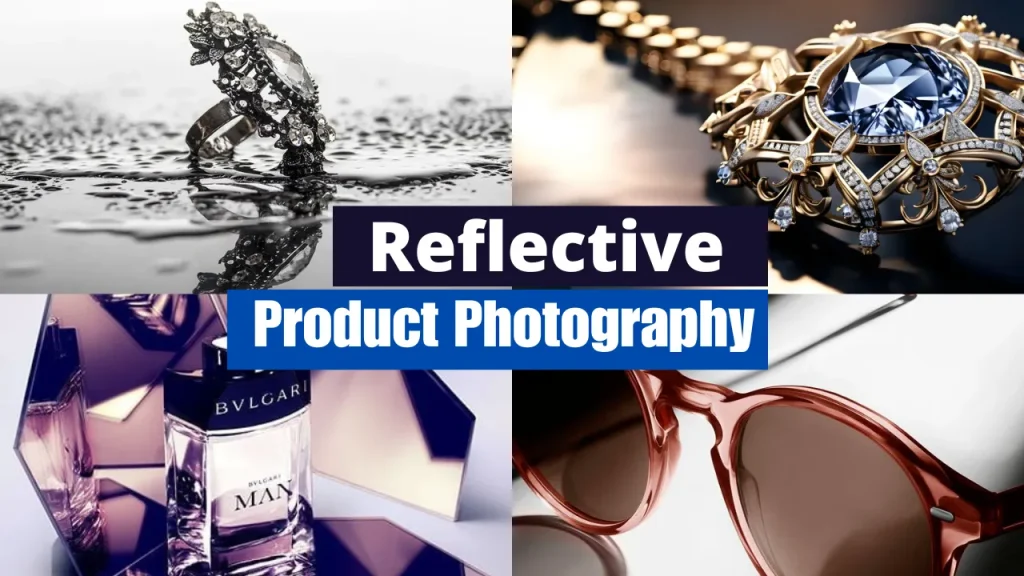
Reflective product photography can be tricky. It takes more than just a great camera and a shiny product to make consumers swoon. A good understanding of reflection laws, the right techniques, and the perfect equipment are all necessary.
But don’t worry, by reading this reflective product photography guide, you will learn to capture reflective product photos that catch customers’ eyes and drive sales. Let’s begin:
What is reflective product photography?
Reflective product photography is a distinct type of product photography that focuses on capturing the unique qualities of reflective items, such as cosmetics, glass, bottles, jewelry, electronics, and other detailed products.
The main challenge in reflective product photography lies in controlling how light interacts with the product’s surface, which can create unwanted glare, hotspots, or distortions.
To overcome these challenges, reflective product photography requires a strategic approach to lighting, composition, and post-processing.
Understanding the law of reflection in product photography

At the heart of reflective product photography lies the fundamental law of reflection – the angle of incidence (the light hitting the surface) is equal to the angle of reflection (the light bouncing back).
This means that when light hits a reflective surface, it bounces back at the same angle, creating an image that can be both beautiful and challenging to capture.
This law can either work for you or against you in reflective product deposit pulsa tanpa potongan photography. Photographing reflective items requires the photographer to understand the angle of incidence and reflection and to adjust the lighting accordingly.
If the lighting is not adjusted correctly, the reflection will appear distorted, resulting in a poor-quality image.
How reflections and shine impact product photography
The appeal of reflective products lies in their ability to catch light and give an impression of depth and dimension.
However, this same quality can also be a double-edged sword, as unwanted glare, hotspots, and reflections can detract from the product’s features and diminish its visual impact.
The art of reflective product photography is all about finding the perfect balance – leveraging the shine and reflections to enhance your product’s appeal while minimizing distractions.
Products that can create unwanted reflections
Some products are more prone to unwanted reflections than others. These include:
- Shiny metal products, such as jewelry, watches, and electronics.
- Glass and translucent products, like bottles, cosmetics, and pharmaceuticals.
- High-gloss products, like luxury cars, furniture, and appliances.
- Metallic products, such as bicycles, motorcycles, and sports equipment.
- Polished stone and marble products, like countertops, sinks, and decorative items.
- Mirrored or reflective surfaces, like mirrors, sunglasses, and watches.
- Furniture with chrome or metallic legs, like coffee tables, chairs, and desks.
- Electronics with shiny screens, like smartphones, tablets, and laptops.
- Automotive parts, like wheels, rims, and body kits.
- Chrome and stainless steel products, such as kitchen appliances, bathroom fixtures, and consumer electronics.
- Jewelry with intricate details, like engagement rings, earrings, and pendants.
- Shiny plastics and resins, found in toys, gadgets, and various consumer goods.
- Luxury fashion items, like handbags, shoes, and accessories with metallic or shiny finishes.
- Home decoration items, like picture frames, vases, and decorative accents with reflective surfaces.
Essential gear for photographing reflective products
Capturing stunning reflective product photography requires the right equipment and tools.
While a good camera is a must-have, the real key to success lies in the accessories and support gear you use to control light, minimize reflections, and ensure professional-grade results.
Camera gear:
- DSLR or Mirrorless Camera: Choose a camera with excellent low-light performance and the ability to shoot in RAW format for maximum flexibility in post-processing.
- Macro Lens: A macro lens enables you to get up close and personal with your products, revealing fine details and textures that can enhance the aesthetic appeal.
- Tripod: A sturdy tripod is essential for reflective product photography, as it helps to eliminate camera shake and ensure tack-sharp images.
Lighting gear:
- Soft Box: Light from soft boxes produces diffused, even illumination that reduces harsh shadows and unwanted reflections.
- Reflectors: Strategically placed reflectors can help to fill in shadows, bounce light, and control the direction and intensity of the illumination.
- Polarizing Filters: A polarizing filter reduces glare and unwanted reflections. It can help you take cleaner, more controlled photos.
Staging and styling gear:
- Seamless Backdrops: For reflective product shots, solid-colored or white background backdrops work great to achieve a polished and professional look.
- Prop Styling Elements: Carefully selected props, such as fabrics, textures, and small decorative items, can help to enhance visual storytelling and create a cohesive, branded aesthetic.
- White Balance Cards: With these cards, you can calibrate the white balance of images and ensure consistent color accuracy throughout your product portfolio.
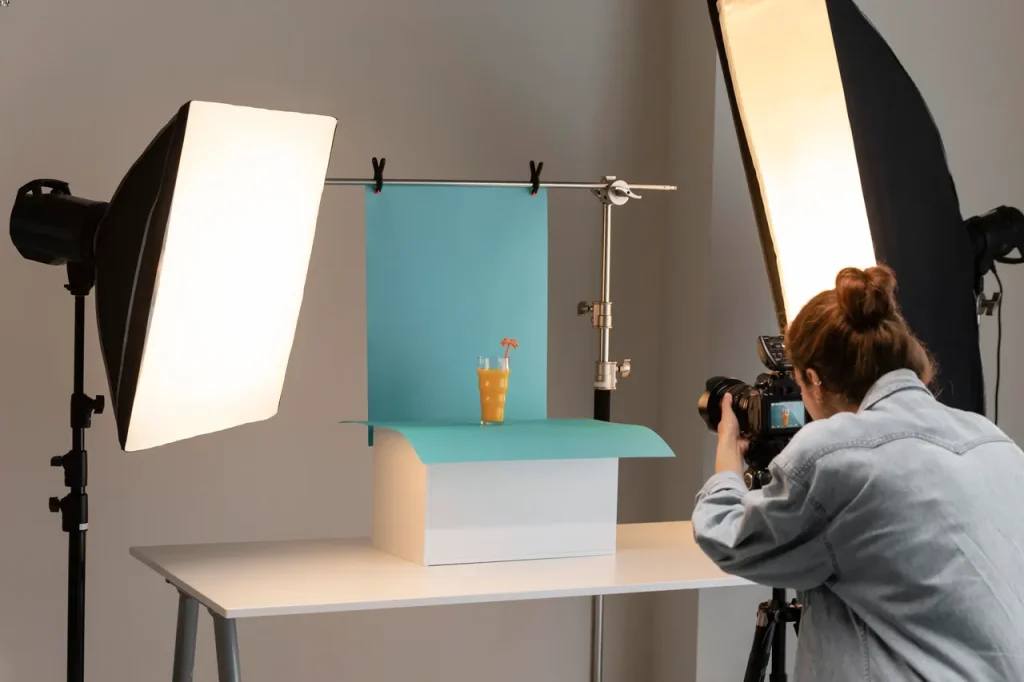
Setting up your studio for reflective product photography
As a photographer, your studio is your playground, sanctuary, and laboratory. It’s where the magic happens, where you bring your creative vision to life. A well-set-up studio makes all the difference in reflective product photography.
Lighting is key

Lighting is the backbone of reflective product photography. It’s what separates a mediocre image from an impressive one. Opt for a combination of soft, diffused light sources and strategic reflectors to create a balanced, even illumination.
Continuous lighting like LED panels or strobe lights can provide high-intensity, directional light to accentuate textures and details on reflective surfaces.
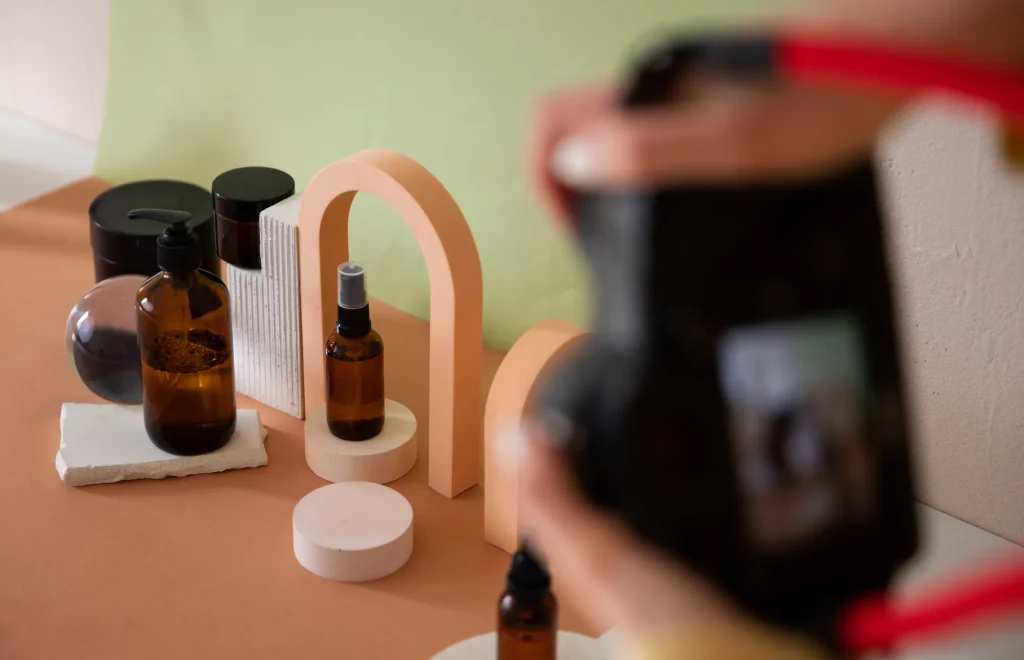
Choosing the right backdrop & props
The backdrop is more than just a plain-colored sheet of paper or fabric. It’s an integral part of your composition, and it can make or break the overall aesthetic of your image.
When photographing reflective products, a neutral-colored backdrop is often the best choice, as it allows the product to take center stage.
Complement the backdrops with carefully selected props that enhance the overall aesthetic without distracting from the main subject.
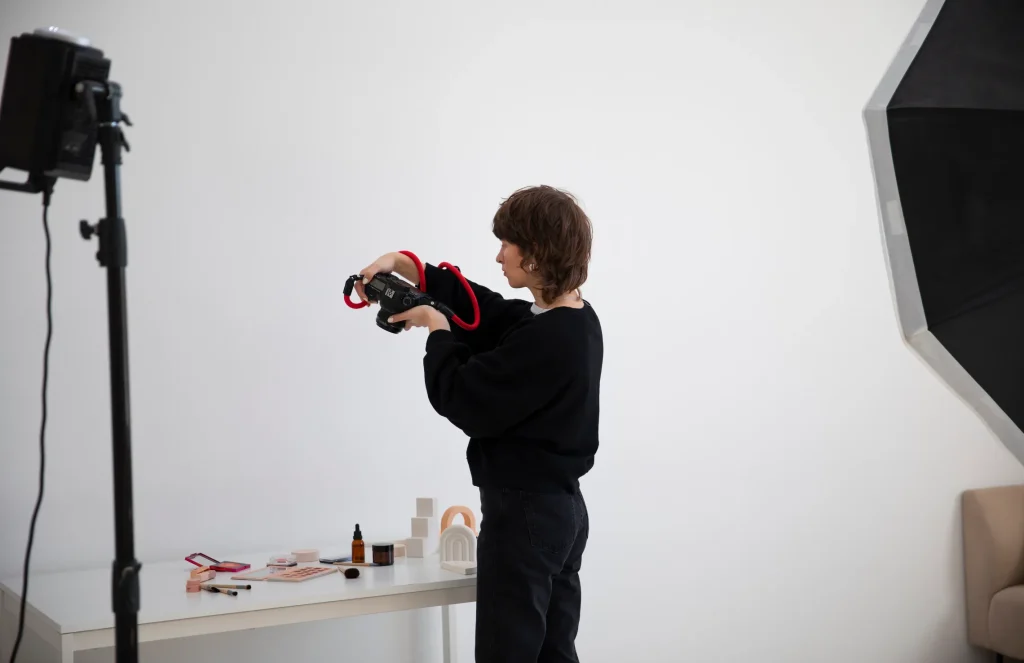
Camera placement and angle
Make sure your camera is turned at an angle that gives you the most flattering view of the reflective products. Experiment with different heights and perspectives to find the sweet spot where the reflections are minimized and the product’s features are highlighted.
Utilize a sturdy tripod to ensure your camera remains steady and your images are sharp.
Attention to detail
Pay close attention to the smallest details in your studio setup. Ensure that the surfaces are clean and free of any dust or debris that could be picked up by the reflective surfaces.
Prepare an environment that sets the stage for your reflective product photography masterpieces by thoughtfully arranging lighting, backdrops, and props.
How to photoshoot highly reflective products
In order to capture reflective products, a range of specialized techniques must be used, each of which is tailored to meet the unique challenges and characteristics of the product.
From the shimmering surfaces of cosmetic and beauty products to the intricate refractions of glass and bottles, every reflective item requires a nuanced approach to bring out its best qualities.
To ensure you’re equipped to tackle the full spectrum of reflective product photography, we’ll explore a set of key techniques tailored to different types of reflective products.
Photographing cosmetic and beauty products
Photographing shiny, reflective cosmetic and beauty products requires a unique approach to effectively capture their allure and visual appeal. Often, these products have intricate packaging, glossy surfaces, and fine details that can be difficult to showcase.
Here are key techniques to photograph reflective cosmetic and beauty products:
- Utilize Soft, Diffused Lighting: Use soft, indirect lighting techniques, such as softboxes or umbrella reflectors, to create an even, flattering illumination. This type of lighting is crucial for minimizing harsh shadows and unwanted reflections.
- Leverage Reflectors Strategically: Strategically placed reflectors can help to fill in shadows, bounce light onto the product, and create a more balanced, cohesive lighting setup.
- Focus on Detailed Compositions: Pay close attention to the product’s intricate details, textures, and packaging elements. Use macro lenses and shallow depth of field to isolate and accentuate these features.
- Minimize Fingerprints and Smudges: Ensure the product’s surface is meticulously clean and free of any fingerprints or smudges, as these can create distracting reflections and blemishes in the final image.
- Embrace Selective Color Grading: Subtle color grading techniques can help to enhance the product’s visual appeal, creating a more cohesive and visually striking image.
Photographing glass, bottles, and translucent products
Photographing glass, bottles, and other translucent products presents a unique set of challenges in reflective product photography.
These items often feature complex refractions, distortions, and reflections that require a thoughtful approach to capture their essence accurately.
Here are the key techniques to photograph translucent items:
- Utilize Backlighting: Backlighting is a powerful tool for highlighting glass and bottle products’ intricate details and refractive qualities. Position the light source behind the product to create a striking, silhouetted effect.
- Experiment with Reflective Surfaces: Strategically placed mirrors or other reflective surfaces can help to create interesting, abstract reflections that complement the product’s design and aesthetic.
- Control Glare and Hotspots: Minimize unwanted glare and hotspots by adjusting the lighting angle, using polarizing filters, and carefully controlling the camera’s position relative to the product.
- Leverage Depth of Field: Make use of a shallow depth of field to emphasize the most important details of the product and blur the background into an artistic, bokeh-filled composition.
- Explore Unique Perspectives: Experiment with different camera angles, such as shooting from above or below the product, to capture unexpected and visually compelling perspectives.
- Incorporate Artistic Prop Styling: Thoughtfully selected props and styling elements can help to create a cohesive, visually appealing narrative around the glass, bottle, or translucent product.
Photographing jewelry, sunglasses, and detailed items
Jewelry, sunglasses, and other detailed reflective products pose a unique challenge in the world of product photography. Their intricate designs, delicate features, and highly reflective surfaces require a specialized approach to capture their essence effectively.
Here are some key techniques to follow:
- Utilize Macro Lenses: Macro lenses allow you to get up close and personal with your subject, revealing the intricate details and textures that are essential for jewelry and detailed products.
- Employ Focused Lighting: Use a combination of directional lighting and reflectors to highlight the product’s contours, create depth, and accentuate the reflective qualities of the surfaces.
- Leverage Selective Focus: Experiment with shallow depth of field to isolate specific product elements, drawing the viewer’s attention to the most important features.
- Minimize Distracting Reflections: Carefully position the product, adjust the lighting, and use polarizing filters to minimize unwanted reflections that can detract from the overall image.
- Incorporate Creative Compositions: Explore unique and unexpected angles, compositions, and framing techniques to create visually striking, dynamic images that compellingly showcase the product.
- Pay Attention to Product Preparation: Ensure that the product is thoroughly cleaned and free of any blemishes, smudges, or imperfections that could be captured in the final image.
- Master Post-Processing Techniques: Utilize advanced photo editing techniques to fine-tune the image, enhance the reflective qualities, and achieve a polished, professional-grade result.
Read More: How to photograph jewelry
Editing your reflective product photographs
No matter how many techniques you use to photoshoot your reflective products, it is common to still have some unwanted reflections or other issues.
Therefore, the post-production stage is just as crucial as the shooting itself. Hiring an expert eCommerce image editing company is probably the best choice for professional edits.
However, you can try the following post-processing techniques to edit your reflective product photographs:
1. Color correction and grading
Start by adjusting the color palette to accurately represent the product’s true colors, taking into account any color casts or tints that may have occurred during the shoot.
Apply a subtle color grade to elevate the mood and atmosphere of the image, but be careful not to overdo it and distract from the product.
2. Retouching and imperfection removal
Use advanced editing tools in Photoshop like the Clone Stamp and Healing Brush to effectively remove any blemishes, dust, or other imperfections on the product’s surface.
However, be cautious not to over-retouch, as this can result in an unnatural, overly processed look.
3. Dodging and burning
Employ selective dodging and burning techniques to subtly enhance the highlights and shadows, creating a more dynamic, three-dimensional appearance. This will help draw the viewer’s attention to the product’s key features and textures.
4. Noise reduction and sharpening
Apply noise reduction techniques to eliminate unwanted grain or digital artifacts, ensuring a clean, smooth appearance. Follow up with selective sharpening to enhance the product’s textures and details without introducing undesirable artifacts.
5. Reflection and glare correction
Use advanced editing tools, such as the Gradient Filter or Local Adjustments, to correct any unwanted reflections or glare that may have occurred during the shoot. This will help create a more balanced, natural-looking image that showcases the product in its best light.
Final thoughts
Reflective Product Photography is a unique and challenging discipline that requires a keen eye, a deep understanding of lighting, and a mastery of post-processing techniques.
Whether you’re an eCommerce business owner looking to improve your online presence or a beginner photographer eager to hone your skills, this guide has provided you with the essential tools and knowledge to excel in the world of reflective product photography.
The path ahead may be filled with experimentation and adaptation, but it is the only way to hone your photography skills.
Reflective product photography FAQ
1. How do I photoshoot highly reflective products?
The key is to use controlled lighting, strategic camera angles, and post-processing techniques to minimize unwanted reflections while highlighting the product’s features.
2. What is the best reflective surface for product photography?
There is no one-size-fits-all answer, as the optimal reflective surface depends on the specific product and the look you’re trying to achieve. Experiment with a variety of materials, such as glass, metal, and high-gloss finishes, to see what works best.
3. How do I remove glare from product photography?
Avoid direct lighting on the reflective surfaces, use diffused, indirect lighting, and adjust the camera angle and product positioning to minimize glare. In post-processing, use tools like the Gradient Filter and Local Adjustments to reduce any remaining glare.
4. What is reflection photography?
Reflection photography is the art of capturing and accentuating a subject’s reflections, often in bodies of water, mirrors, or other shiny surfaces.
5. How can I effectively capture reflections in my photos?
Pay attention to the camera angle, the product’s positioning, and the lighting. Experiment with different surfaces and backgrounds to create interesting reflections that complement the product. In post-processing, use dodging, burning, and other techniques to enhance the reflections.
6. How do you use reflectors in product photography?
Reflectors are invaluable for controlling the lighting and minimizing unwanted reflections. Position them strategically to fill in shadows, bounce light onto specific areas, and create a more even, balanced illumination across the product.
7. How do I photograph shiny objects without reflection?
Utilize indirect, diffused lighting, matte backgrounds and props, and strategic camera angles to minimize reflections. In post-processing, use advanced editing tools to further refine the image and remove any remaining unwanted reflections.
8. How do you take a picture with a reflector?
Set up your reflector opposite the primary light source, angled to bounce light onto the product. Set up your reflector opposite the primary light source, angled to bounce light onto the product. Try adjusting the reflector’s position, angle, and size for the desired lighting effect.